Snow Dog Woodworks and Quiltworks
Pursuing the tradition of creating finely handcrafted items in wood and fabric
Longarm Quilting Services ~ Londonderry, NH

When I first started turning bowls, I purchased a set of bowl jaws for my Vicmarc scroll chuck. These enormous jaws allowed me to finish the bottom of my bowls and worked well for many years. Eventually, I tired of the need to change jaws every time I completed a bowl and when I saw vacuum chucking demonstrated at a local symposium, I was captivated. The thought of holding a piece on the lathe via vacuum without having to worry about how to grab the piece in a set of jaws opens up a whole new world of opportunities. Vacuum chucking offers a nice alternative to other methods of holding a piece on the wood lathe.
The process of putting together a vacuum chucking system is relatively straightforward, but there are many bits and pieces of information available online that make it somewhat confusing. To start, there are many different alternatives that one could pursue in terms of which vacuum pump to buy. These alternatives become complex given the price range starting at well under $50 if you choose to purchase a used vacuum pump from E-Bay to several hundred dollars if purchased new. I looked long and hard at the pumps offered on E-Bay, but the bottom line is that many vendors don’t guarantee quality or that the pump is even in working condition since they have no means to verify. I also read an article that mentioned that buyers should be careful of used vacuum pumps as some come from the medical field and could be contaminated depending on their original use. This caused enough worry to make me decide to purchase a new Gast 523 vacuum pump from Craft Supplies – at least I am guaranteed to get a working pump of good quality and I’ll know where it has been and what/how it has been used. This is the heart of my vacuum chucking system.
I looked long and hard to determine what I needed for plumbing and other parts. Ultimately, I decided that I needed a needle valve rather than a ball valve for the bleeder based on some comments from a few folks - the reasoning being that a needle valve gives you much more precise control of the actual vacuum force that you are pulling. It takes several turns on the needle valve to open it wide open. In the end, I’m glad that I made this choice as the needle valve allows me to dial in the precise amount of vacuum force that I want down to 1-2 inches of mercury.
I also concluded that I needed two filters - one for the line coming from the lathe and the other filtering air entering through the bleeder. The Gast vacuum pump also has internal filters, but I don’t want to rely on those and would rather trap dust and debris before it enters the pump. After I had received all the parts, I realized that one filter would probably have been adequate in the line going back to the pump, but better safe than sorry. The cost of the filters is trivial compared to the pump, so better to protect the pump as best I can. I purchased my vacuum filters from Veneer Supplies.
I purchased a liquid filled vacuum gauge from McMaster Carr, and most of the remaining plumbing parts came from www.veneersupplies.com. One of the specialty parts that I got from Veneer Supplies is a Lock-On Vacuum Connector intended specifically for vacuum systems - this part allows me to easily connect/disconnect the pump from the rest of the system. This part supposedly works better than the quick connectors designed for compressed air – since I haven’t tried those, I can’t really offer any comparison but the locking connector works well for me.
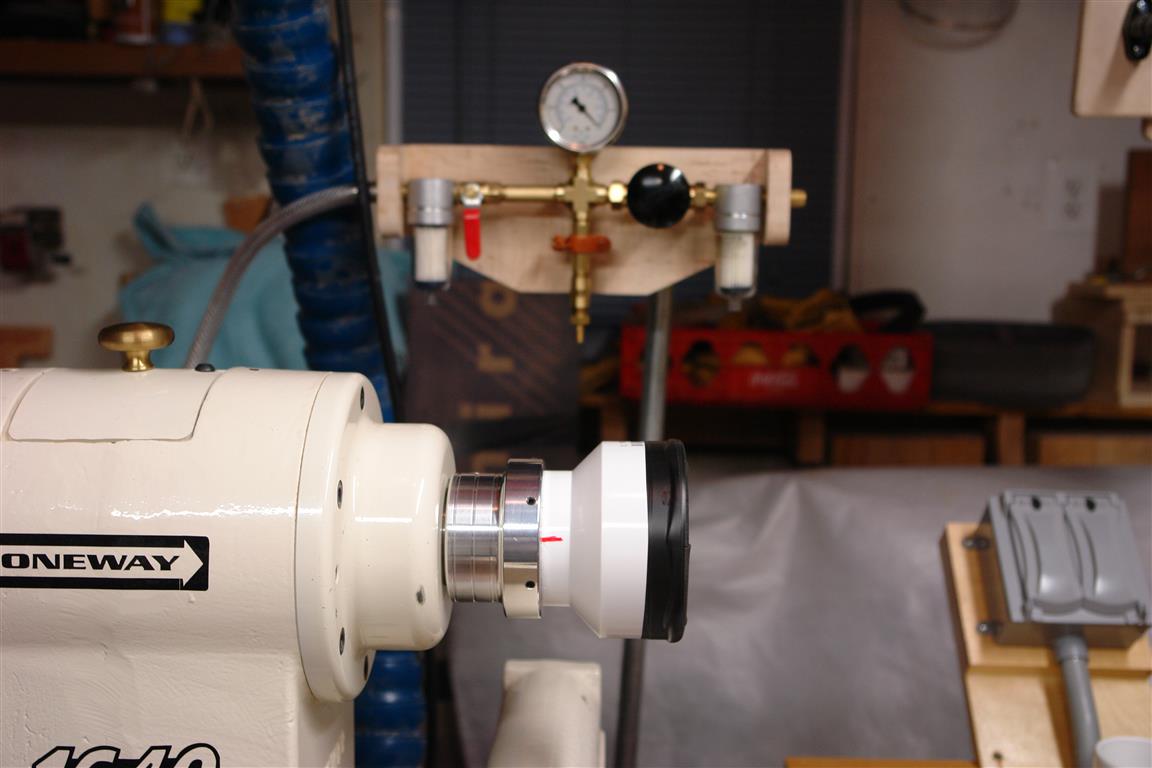
Here's a pic of my gauge setup - the locking connector to the bottom goes off to the Gast 523 and the tube to the left goes to the rotary adapter installed on the tailstock of the lathe. Note that the connector on the right remains open as this is the inlet to allow air into the system via the bleeder valve (black handle) to the right of the gauge. The ball valve on the left (red handle) allows me to quickly turn vacuum off going to the lathe should I need to cut vacuum in a hurry whether to adjust a piece, etc.

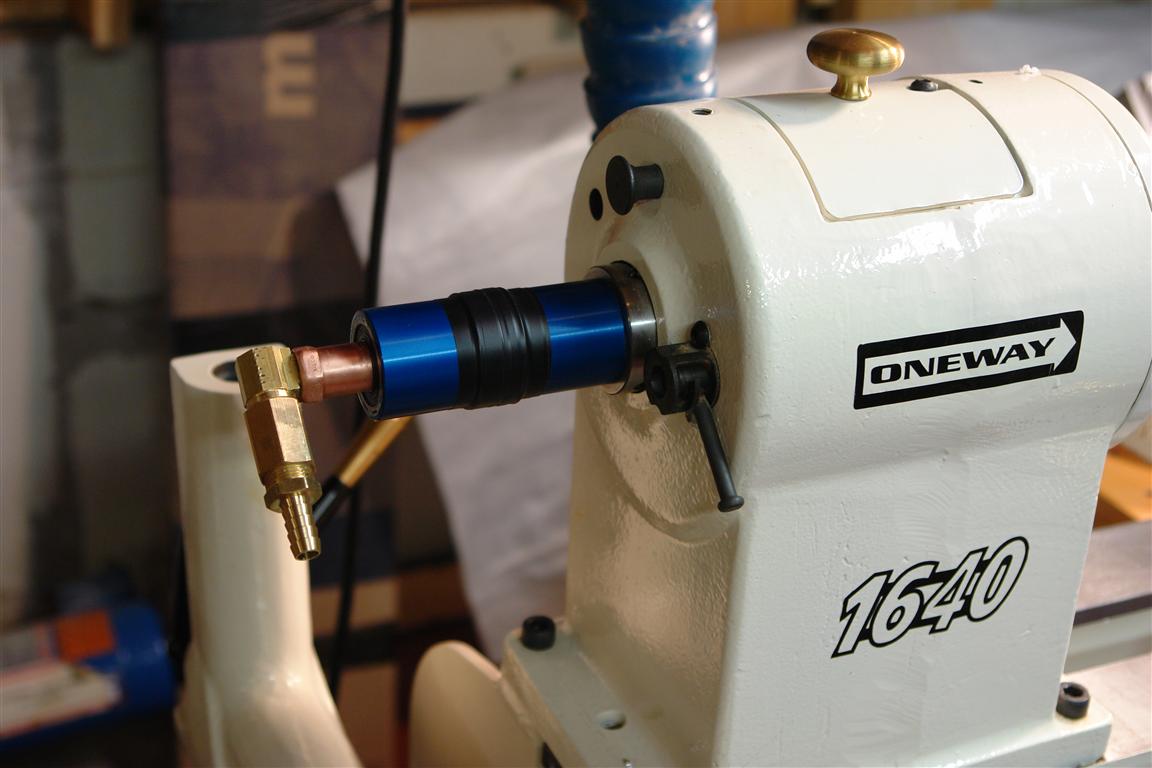
For the connection to the tailstock, I chose to make my own Oneway-like rotary adapter. Since I happened to have a spare Beall buffing adapter that I wasn't using, I decided to give it a shot as the price comparison was rather dramatic ($100+ for a Oneway rotary adapter vs. ~$30 for bearings and I already had the adapter for the lathe). I drilled out the end of the Beall buffing adapter (made from aluminum, so drilling was easy) and inserted two sealed bearings into the end using a combination of epoxy and silicone sealant. I epoxied the bearings into place (taking care not to apply any to the center ring that spins) and added a bit of silicone sealant between the bearings which I think helped to seal leaks considerably. The bearings were 1 3/8" O.D. and 5/8" I.D. - these fit well within the aluminum cylinder and were just the right size to tap in a piece of common 1/2" copper plumbing pipe into the center. From the plumbing pipe, you can readily find adapters and converters to convert to 1/4" NPT. As far as I can tell, I'm getting very little leakage so far - time will tell how well this part will hold up. By the way, you'll notice black electrical tape in the pics - that's because the Beall adapter has a through hole for the purpose of inserting a rod to remove the adapter from the lathe. I plugged this hole with a piece of plastic from a butter dish and then covered that with black electrical tape - that way, if the adapter ever gets stuck on the lathe, I can still get to the hole with little effort/damage.
Here are a couple of pics of my homemade rotary adapter:

Finally, I decided to purchase a vacuum chuck from JT Turning Tools. I ran into a bit of trouble fitting this chuck onto my Oneway 1640 - it seems that the threads started about 1/8" too soon which prevented the chuck from seating properly on the spindle shoulder. I spoke with Tom on the phone regarding these issues, and at first he seemed dedicated to correcting this issue. I sent him a few detailed pictures of the parts as they fit on my standard Oneway lathe spindle and explained that I thought that I thought that the first thread needed to be removed to allow the chuck to seat properly on the spindle rather than bottoming out on the threads. After several conversations on the phone, I lost contact with him and ultimately chose to grind off the first thread with my Dremel tool which fixed the problem. This resolved the problem and I am happy with the chuck but disappointed that I had to customize such an expensive part to make it work. I can only recommend caution when purchasing this particular part as you may need to customize it to make it work correctly.
Here's a pic of the vacuum chuck:
After putting it all together, I tried the system with a piece of 3/4" Maple board held to a 3" vacuum chuck and the system was drawing 25.5 inches of mercury. Given that the pump alone is rated to pull ~26 inches of mercury, it seems that I have little to no leakage and the system should serve me well.
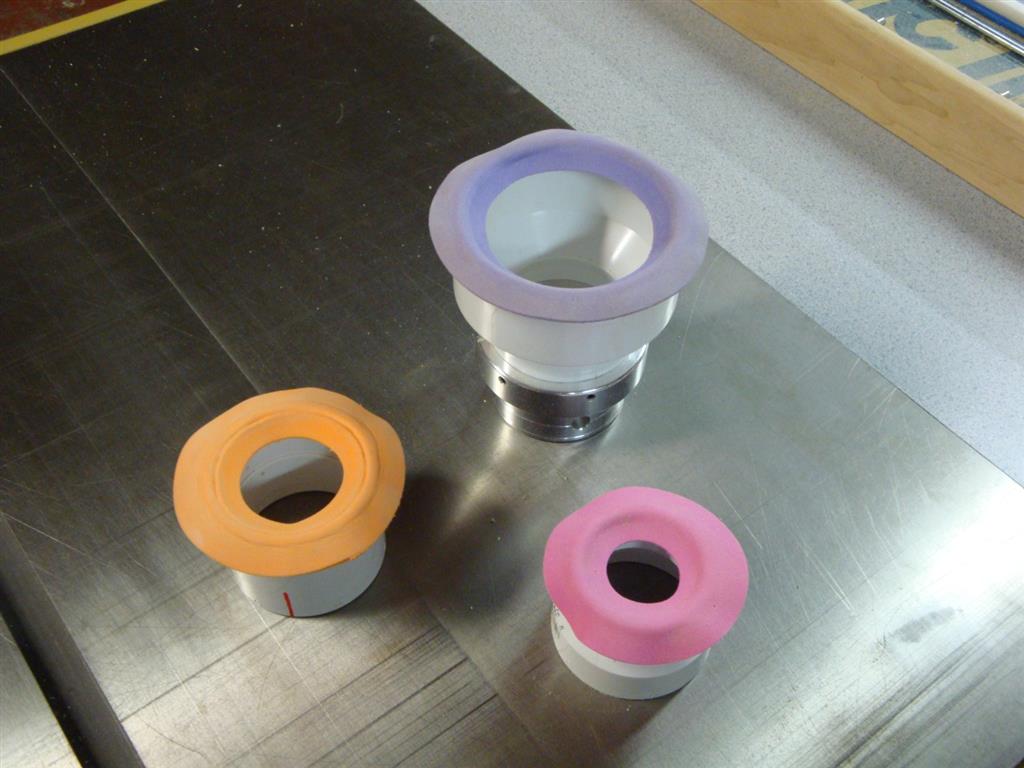
Note that the black foam in the picture was ¾” wide self-adhesive vacuum foam that I purchased from VeneerSupplies. It worked OK, but I had issues getting it to stay in place, which is why the picture also shows black electrical tape that I used to attempt to hold the foam in place. I have since purchased craft foam from Wal Mart – this comes in discs that are approximately 6” in diameter – I think that I got 50-75 discs for about $2. I only needed a few discs, but that was the smallest package that I could find. I applied spray-on glue to the disc and stuck it to the PVC plumbing parts that I am using for my chuck. Then I put the chuck on the lathe and cut the center away from the disc with a skew chisel. This worked much better and I would highly recommend these craft foam discs. You can see these discs installed on three different sized PVC chucks below (note that the black foam has been removed and replaced – I no longer use it!):
In general, I am completely satisfied with my vacuum chucking system and would highly recommend it to others. While the collection of parts is relatively simple and straightforward, it can be somewhat overwhelming shopping for these parts with the wide variety of articles on this topic.
Finally, please be aware that if you do assemble a vacuum chucking system for your own use, use caution when turning wood held on via vacuum as flaws in the wood and/or turning mistakes can break the vacuum in an instant and the blank will be free to fly away from the lathe. This can happen as a result of turning away the remaining wood and revealing an underlying void in the piece or simply turning too thin and introducing a hole in the wood. Note that the force exerted by the vacuum can be quite strong which can also cause the blank to implode. In general, I have developed a sense for the sounds coming from a solid piece of wood and you can easily identify a change in this sound when the wood becomes too thin to turn. I would also recommend constantly keeping an eye on the vacuum gauge so that you are aware when the vacuum pressure drops to levels that are unsafe to continue to hold the wood in place on the lathe.
Download a PDF of this article